Menu

#1196 Paypal plugin

Parent Category:
DPCalendar
Category:
Payment plugins
Last Updated:
Allon Moritz, Wednesday, 23 August 2023 12:10
Created:
Wednesday, 06 August 2014 03:31
Hits:
8657

This feature is part of the DPCalendar Professional subscription.
SubscribePHP 7.4PHP 8Joomla 3.10Joomla 4.4Joomla 5

Introduction

With PayPal, your visitor can pay instantly using his credit card or checking account without giving out your credit card and checking account information. You must have an active PayPal account before configuring the plugin.

Configure the plugin

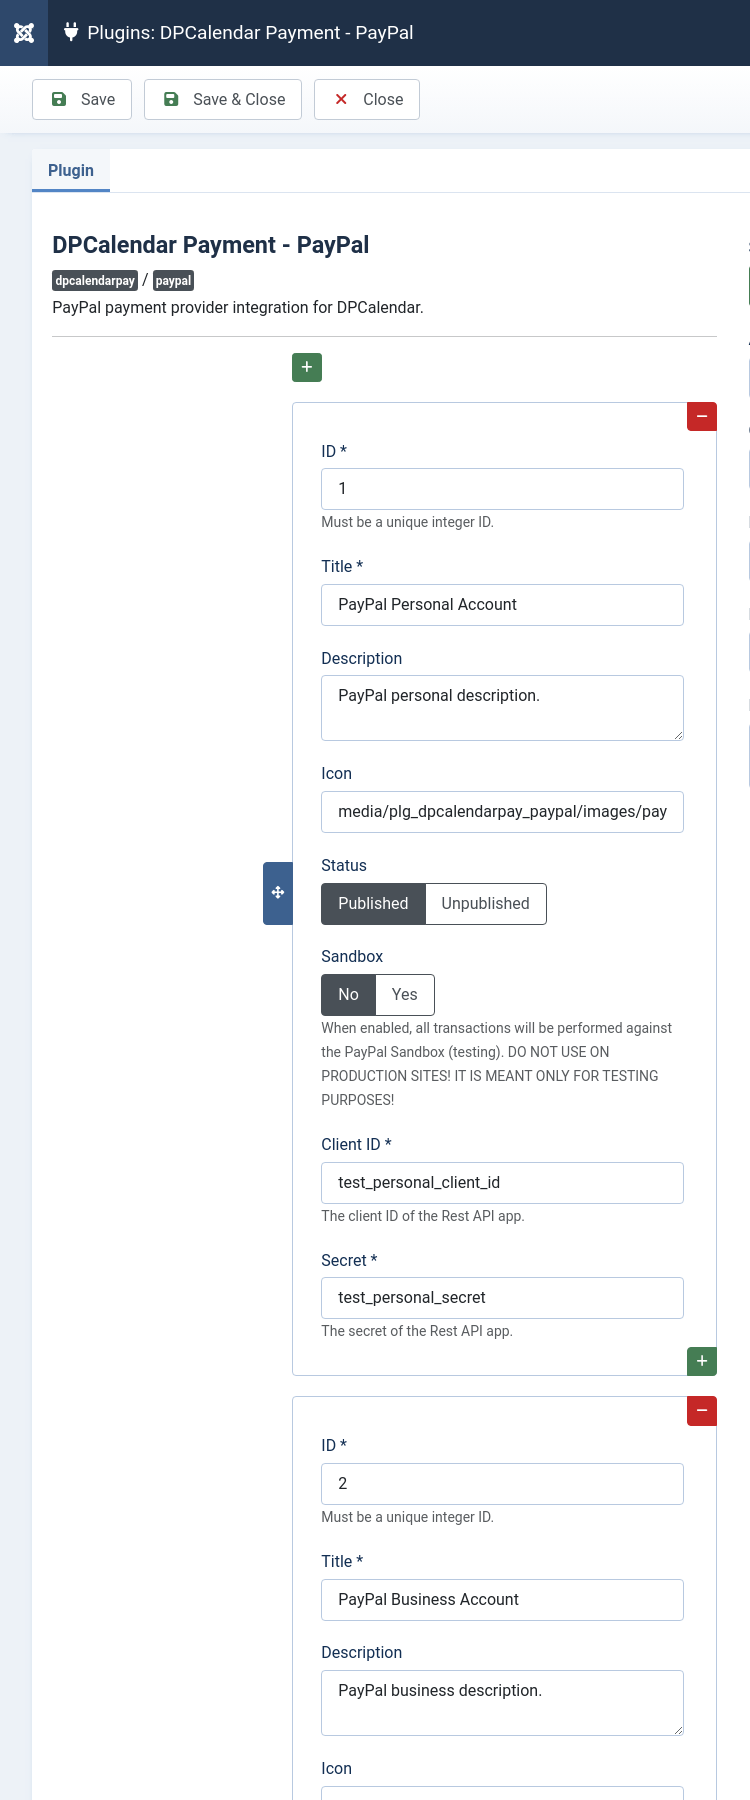
The DPCalendar PayPal plugin allows to add unlimited PayPal accounts to DPCalendar. When the plugin is opened in the back end, then you can click on the "+" button to add a new configuration. There you can fill the following fields:

  1. ID
    The ID of the configuration, must be a unique integer amongst the different configurations within the plugin.
  2. Title
    The title of the configuration. Appears in the drop down in the event form where you can select individual payment providers.
  3. Description
    The description which will be shown on the front end provider selection list when confirming the booking.
  4. Icon
    The icon which will be shown on the front end provider selection list when confirming the booking.
  5. Status
    The publishing status of the payment provider.
  6. Sandbox
    If this account should be used as sandbox for testing or in production.
  7. Client ID
    The API client ID, see below how to get it.
  8. Secret The API secret, see below how to get it.
PayPal payment provider configuration

Get the API keys

The PayPal APIs are HTTP-based RESTful web services that use OAuth 2.0 for authorization. It uses a client id and secret as credentials for authorization which can easily being revoked without exposing username or password. Please follow the steps below to get the necessary settings:

  1. Log in on developer.paypal.com.
  2. Open the dashboard.
  3. On the left sidebar click on "Dashboard -> My Apps and Credentials".
  4. Click on "Live".
  5. Click on "Create App".
  6. Define a name and hit the "Create App" button.
  7. Click on the new created app.
  8. Copy the "Client ID" value to the DPCalendar PayPal plugin configuration.
  9. Copy the "Secret" value to the DPCalendar PayPal plugin configuration.

Using the PayPal Sandbox

Using the PayPal Sandbox is not even half as intuitive as you might think. We have documented every single step you have to take in order to use the Sandbox on your site.

Create a seller account

  1. Log in on developer.paypal.com.
  2. On the left sidebar click on "Sandbox -> Accounts".
  3. Click on "Create Account".
  4. In the modal click on the bottom on "Create custom account".
  5. Set the account type to "Business", choose a country if you want and fill the other fields like email and password. Make sure these are different than your regular PayPal account!!
  6. Click on "Create Account".

Create a buyer account

  1. Log in on developer.paypal.com.
  2. On the left sidebar click on "Sandbox -> Accounts".
  3. Click on "Create Account".
  4. In the modal click on the bottom on "Create custom account".
  5. Set the account type to "Personal", choose a country if you want and fill the other fields like email and password. Make sure these are different than your regular PayPal account!!
  6. Click on "Create Account".

Set up the plugin for use with PayPal Sandbox

  1. Go to Extensions , Plug-in Manager.
  2. Find the DPCalendar Payment - PayPal plugin and edit it.
  3. Set Sandbox to Yes and driver to "Rest".
  4. Log in on developer.paypal.com.
  5. Open the dashboard.
  6. On the left sidebar click on "Dashboard -> My Apps and Credentials".
  7. Click on "Sandbox".
  8. Click on "Create App".
  9. Define a name and select the sandbox business account, then hit the "Create App" button.
  10. Click on the new created app.
  11. Copy the "Client ID" value to the DPCalendar PayPal plugin.
  12. Copy the "Secret" value to the DPCalendar PayPal plugin.
  13. Click on Save & Close in the plugin toolbar.

Testing DPCalendar with the PayPal Sandbox

  1. Make sure you have at least one event which happens in the future which has a price set and enough free seats. The user you are testing it with needs to have the attending setting set in the calendar.
  2. Click on the attending button on the event details view. You should see now a button which has the label "Pay with PayPal". Click on it and you should be redirected to the PayPal sandbox site.
  3. Make sure the URL begins with https://www.sandbox.paypal.com. If not, you are doing something wrong and you have to set up the plugin again.
  4. Make sure that in the top left corner you see the name you registered with PayPal Sandbox followed by the words "Test Store". If not, you are doing something wrong and you have to set up the plugin again.
  5. Login using the Sandbox personal account email and password and go through with the payment. Remember to click the Pay Now button!
  6. You should be redirected to the "Thank you" page of DPCalendar. In the back end you should see the attending record which has the status published.
  7. The subscription will be enabled. If it is not enabled please make sure that you are running the test from a live server which is accessible from the Internet (NOT your local machine; this will NOT work), your site is NOT set to Off-line Mode, the PayPal plugin is published and its access set to Public (any other access will NOT work) and that there is no firewall / security extension blocking incoming connections from PayPal.

Troubleshooting

  • Payment does not work in modal window
    When an attendee wants to pay for an event with PayPal and the event page is opened in a modal dialog, then it can happen that PayPal refuses to load. This is a security measure when the attendee has configured MFA in PayPal. The only way to prevent this is to not lead the event details page in a modal dialog.

Comments (0)

We use cookies on our website. Some of them are essential for the operation of the site, while others help us to improve this site and the user experience (tracking cookies). You can decide for yourself whether you want to allow cookies or not. Please note that if you reject them, you may not be able to use all the functionalities of the site.