DPCalendar comes with a full featured event booking system to turn your visitors into attendees of your events. We know that a booking system can become a complex matter, but DPCalendar aims to make the setup as easy as possible without loosing any flexibility. It's possible to define unlimited prices with unlimited different currencies, discounts and different tickets per event, or enable a waiting list when the ticket limit is reached. Payment providers like PayPal or Stripe are implemented trough Joomla plugins to have maximum configuration possibility and extendability. With it's powerful geo location based Taxes you can also charge easily taxes per country. Certificates do allow to show the appreciation for attendees when they have successfully participated in the event.
The booking system consist of two main entities, the booking and the tickets. During the booking process the visitor can create one booking with multiple tickets. There is always a relation between the booking and the ticket. While you can attend a whole series of events every ticket has also a relation to an event, but the booking not.
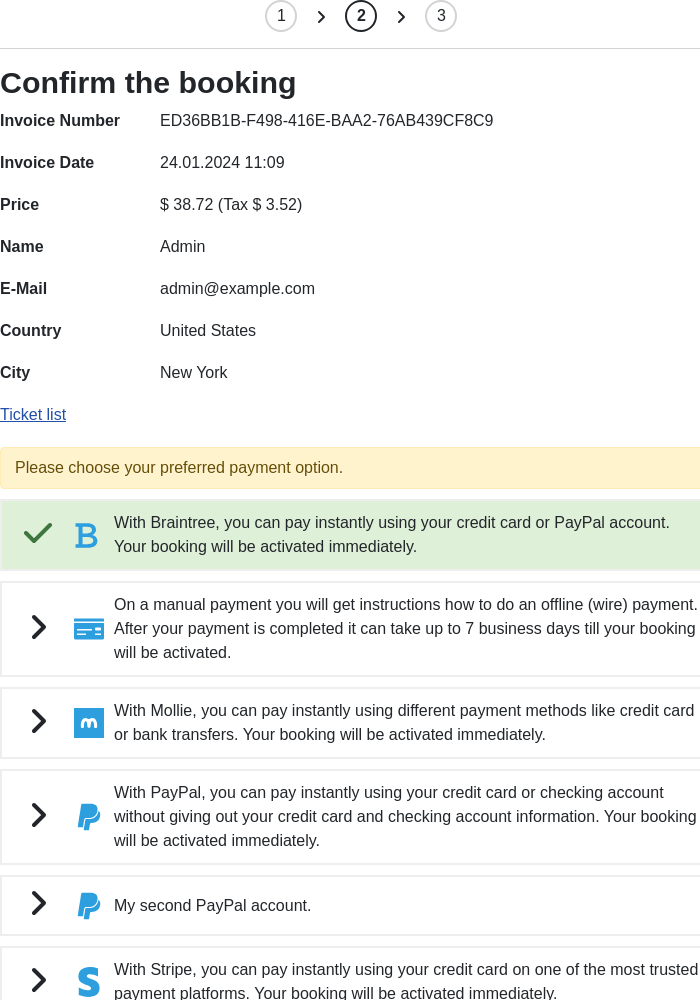
If an event has ticket prices, then the payment system of DPCalendar comes into action. Are the tickets selected, then the attendee has to confirm the booking on an extra step where a payment options needs to be selected. It is like a checkout option on the web shop. Each payment provider in DPCalendar can be configured in the respective plugin settings. Each payment plugin allows to add unlimited different configurations. This is very handy when you have a platform with multiple authors and you want to give them the possibility to directly integrate their preferred method to receive payments.
If a payment provider is setup with a fee, the price of the booking will be updated once the provider is selected in the payment page. This fee is then added to the price of the booking, when the attendee gets redirected to the payment provider payment page.
A booking (tickets do inherit automatically) can have different states, depending on where the attendee is in the booking process. We describe the steps here for better understanding:
Basically setting up the booking system is a three step process. While the first two steps have to be done only once.
Review and adjust the DPCalendar options for the booking system. Define the address for the invoice, etc.
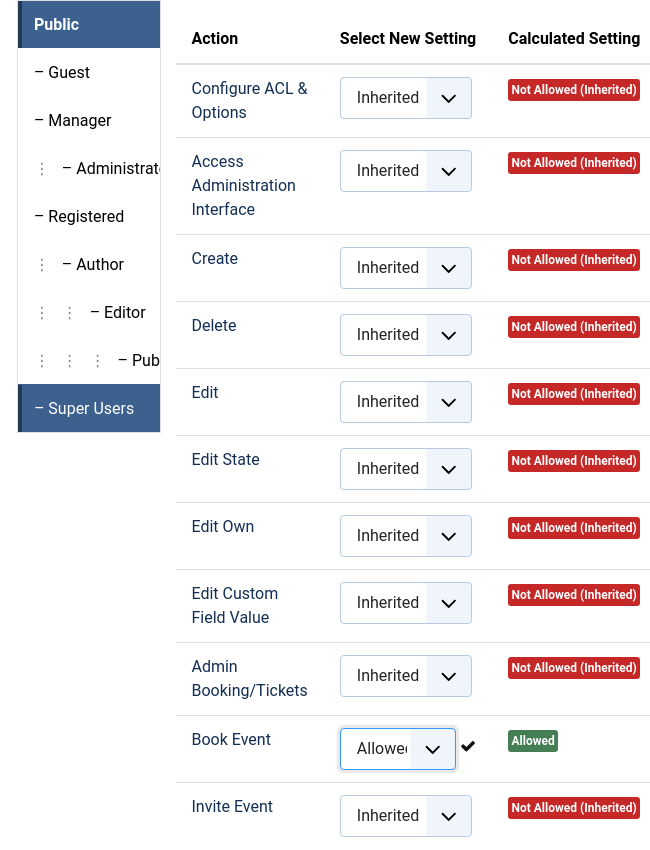
Every DPCalendar calendar has a permission setting where the site admin can define which user groups can book tickets for the events of the calendar. Set that permission to allowed for the user groups who can book tickets. Keep in mind, when the "Public" group has the book permission, then not logged in visitors can book events.
Initially this permission is denied for all users, except the super admins. To control it globally for all calendars, then site admin can change it in the global DPCalendar options. The calendars will inherit it then automatically. There are more information in the ACL article how to use permissions.
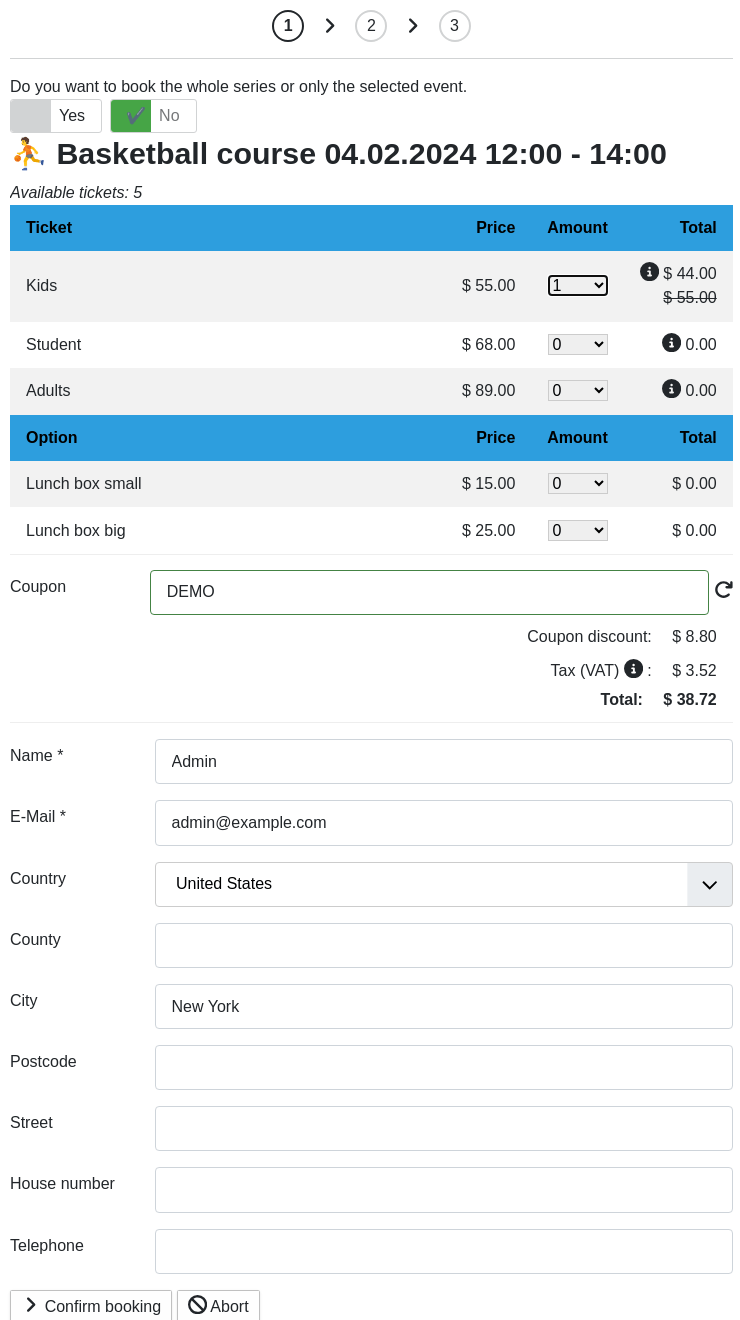
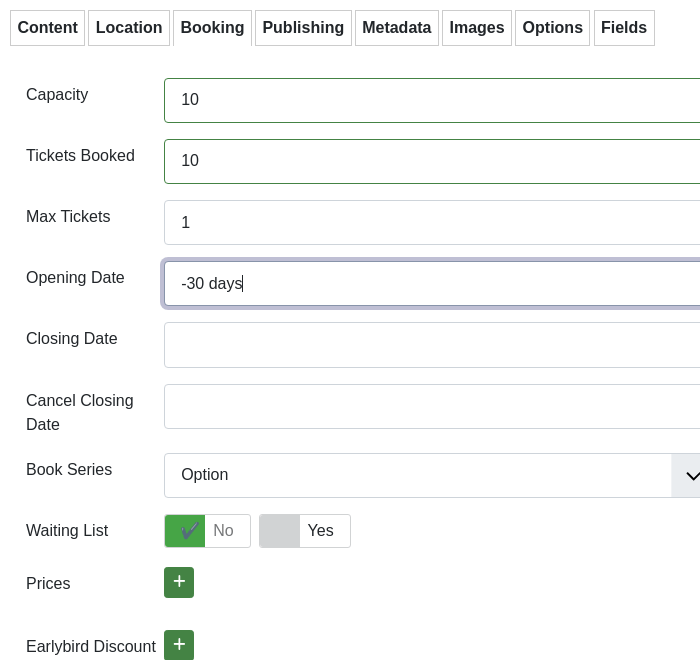
Create an event which happens in the future and set the capacity value to a number higher than 0 (empty means unlimited). Additionally define some optional prices, discounts and other configuration options in the booking tab.
When a visitor is opening an event which accepts bookings, then a booking panel is shown in the event details view. The booking button forwards the visitor to the booking wizard. At the top of the booking views is a step panel shown which indicates in which process step the attendee is.
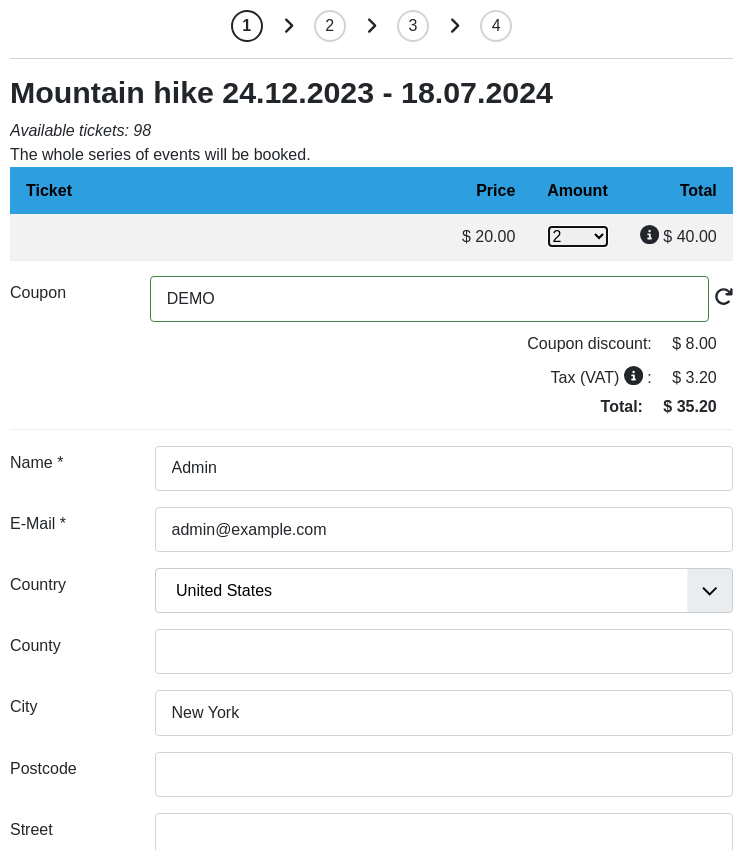
In the first step the booking form gets opened when the visitor wants to attend the event. The visitor has to define how many tickets should be booked. Some basic information like name and email (which are required) and some optional information like address and telephone number can be added here too.
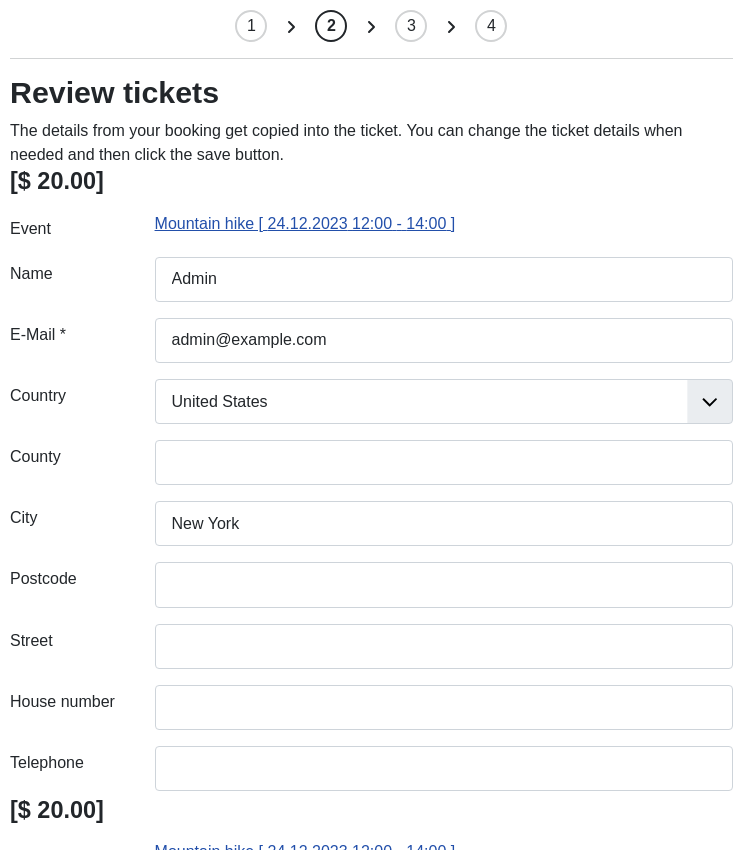
In the second step, the attendee has to review the tickets. The tickets inherit the values of the booking, but can be changed here.
As default setting this review step is hidden when only one ticket is selected, but can be turned off or always enabled in the booking system configuration of the global DPCalendar options.
In the third step the booking will be confirmed, afterwards it will be activated. If the booking needs a payment then the list of available payment providers is shown where the attendee has to choose one from.
When a terms article is selected then the attendee needs to check a confirmation box to proceeded with the booking.
For free events, this step can be hidden in the global DPCalendar options.
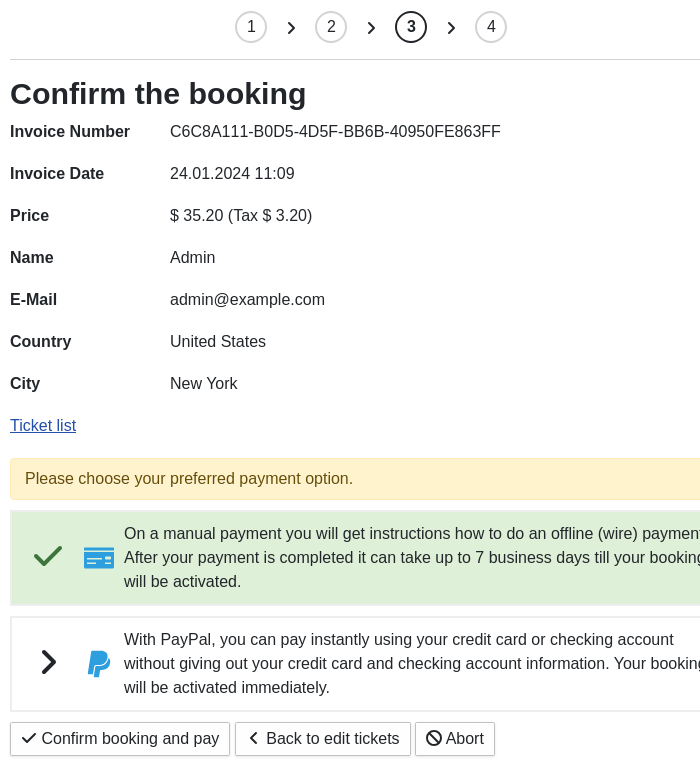
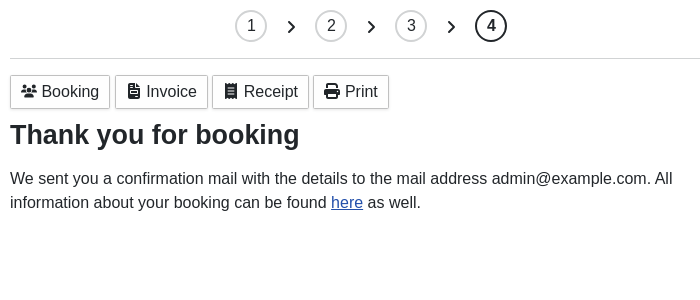
After the "Confirm booking and pay" button is hit, then booking gets redirected to the payment provider page where the payment can be done. If it is an offline payment, means an invoice will be sent out, then the booking gets into an "On hold" state and an information page is shown. The invoice is sent by mail or can be downloaded here as well.
This step is also shown when the payment is done and the visitor returns from the payment provider page like paypal or mollie.
Comments (0)